
Justin Rose's timeless swing relies on a handful of triggers that help him get into position for consistent contact.
The post Justin Rose’s 5 swing ‘triggers’ for consistent ball striking appeared first on Golf.
Justin Rose's timeless swing relies on a handful of triggers that help him get into position for consistent contact.
The post Justin Rose’s 5 swing ‘triggers’ for consistent ball striking appeared first on Golf.
Drivers
Modern drivers are engineered for maximum distance and forgiveness. Key technological features include:
Iron technology focuses on consistency, feel, and playability. Recent developments include:
Jordan Spieth's season ended at the FedEx St. Jude Championship, and now questions about what comes next loom.
The post Jordan Spieth’s season ends at FedEx St. Jude with 2 questions lingering appeared first on Golf.
How to watch the 2025 BMW Championship at Caves Valley Golf Club this week, including a full BMW Championship TV schedule.
The post 2025 BMW Championship: TV schedule, streaming info, how to watch, tee times appeared first on Golf.
The 2025 BMW Championship odds are out, and World No. 2 Rory McIlroy is among the betting favorites at the second FedEx Cup Playoffs event.
The post 2025 BMW Championship odds: Rory McIlroy among favorites in return appeared first on Golf.
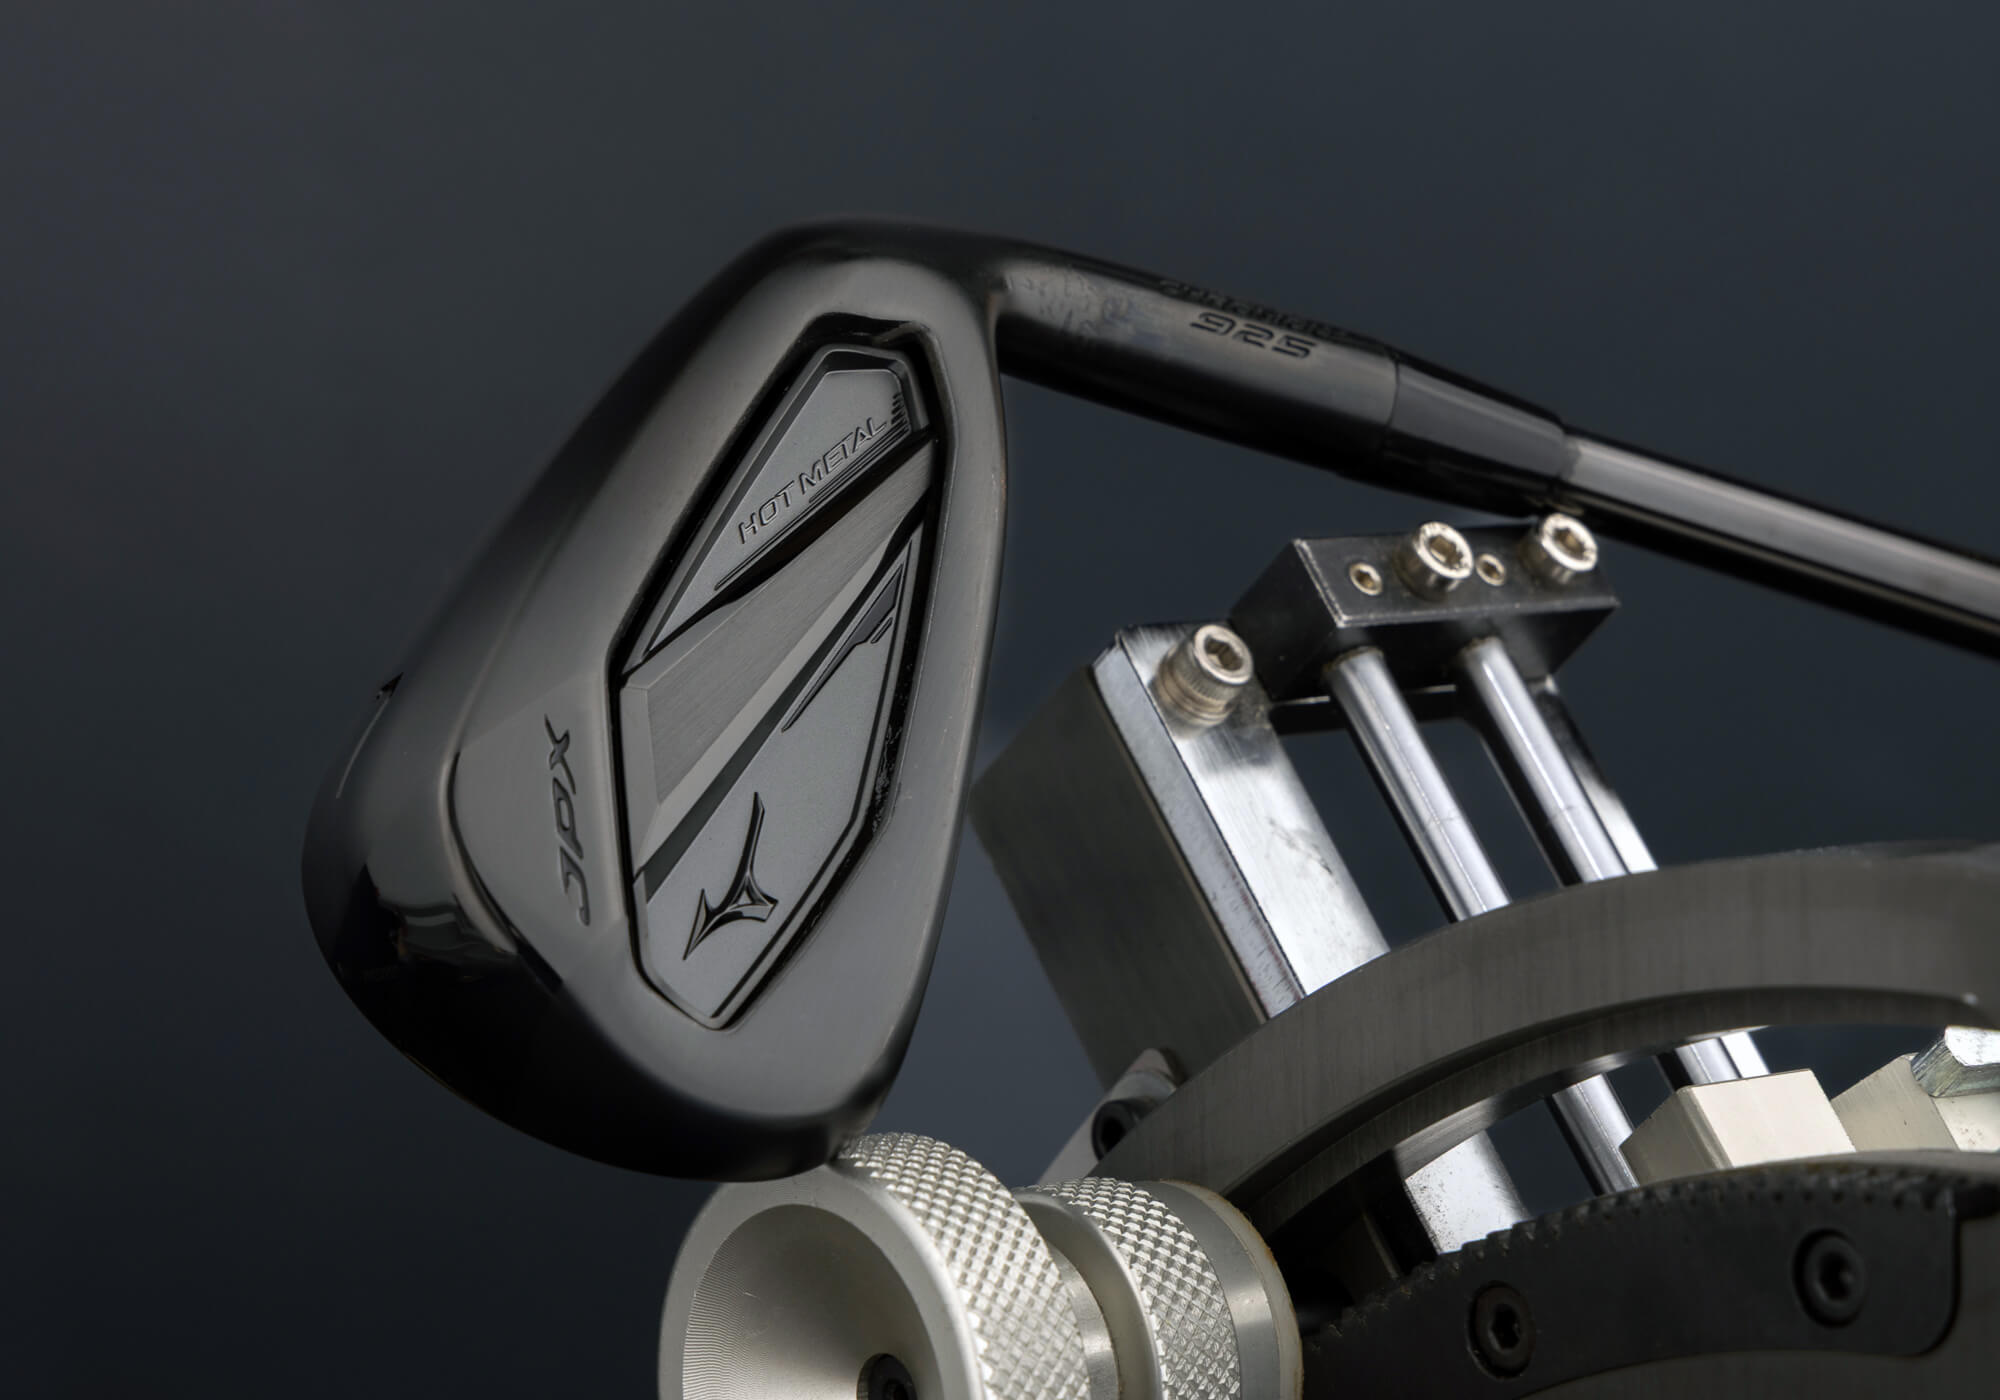
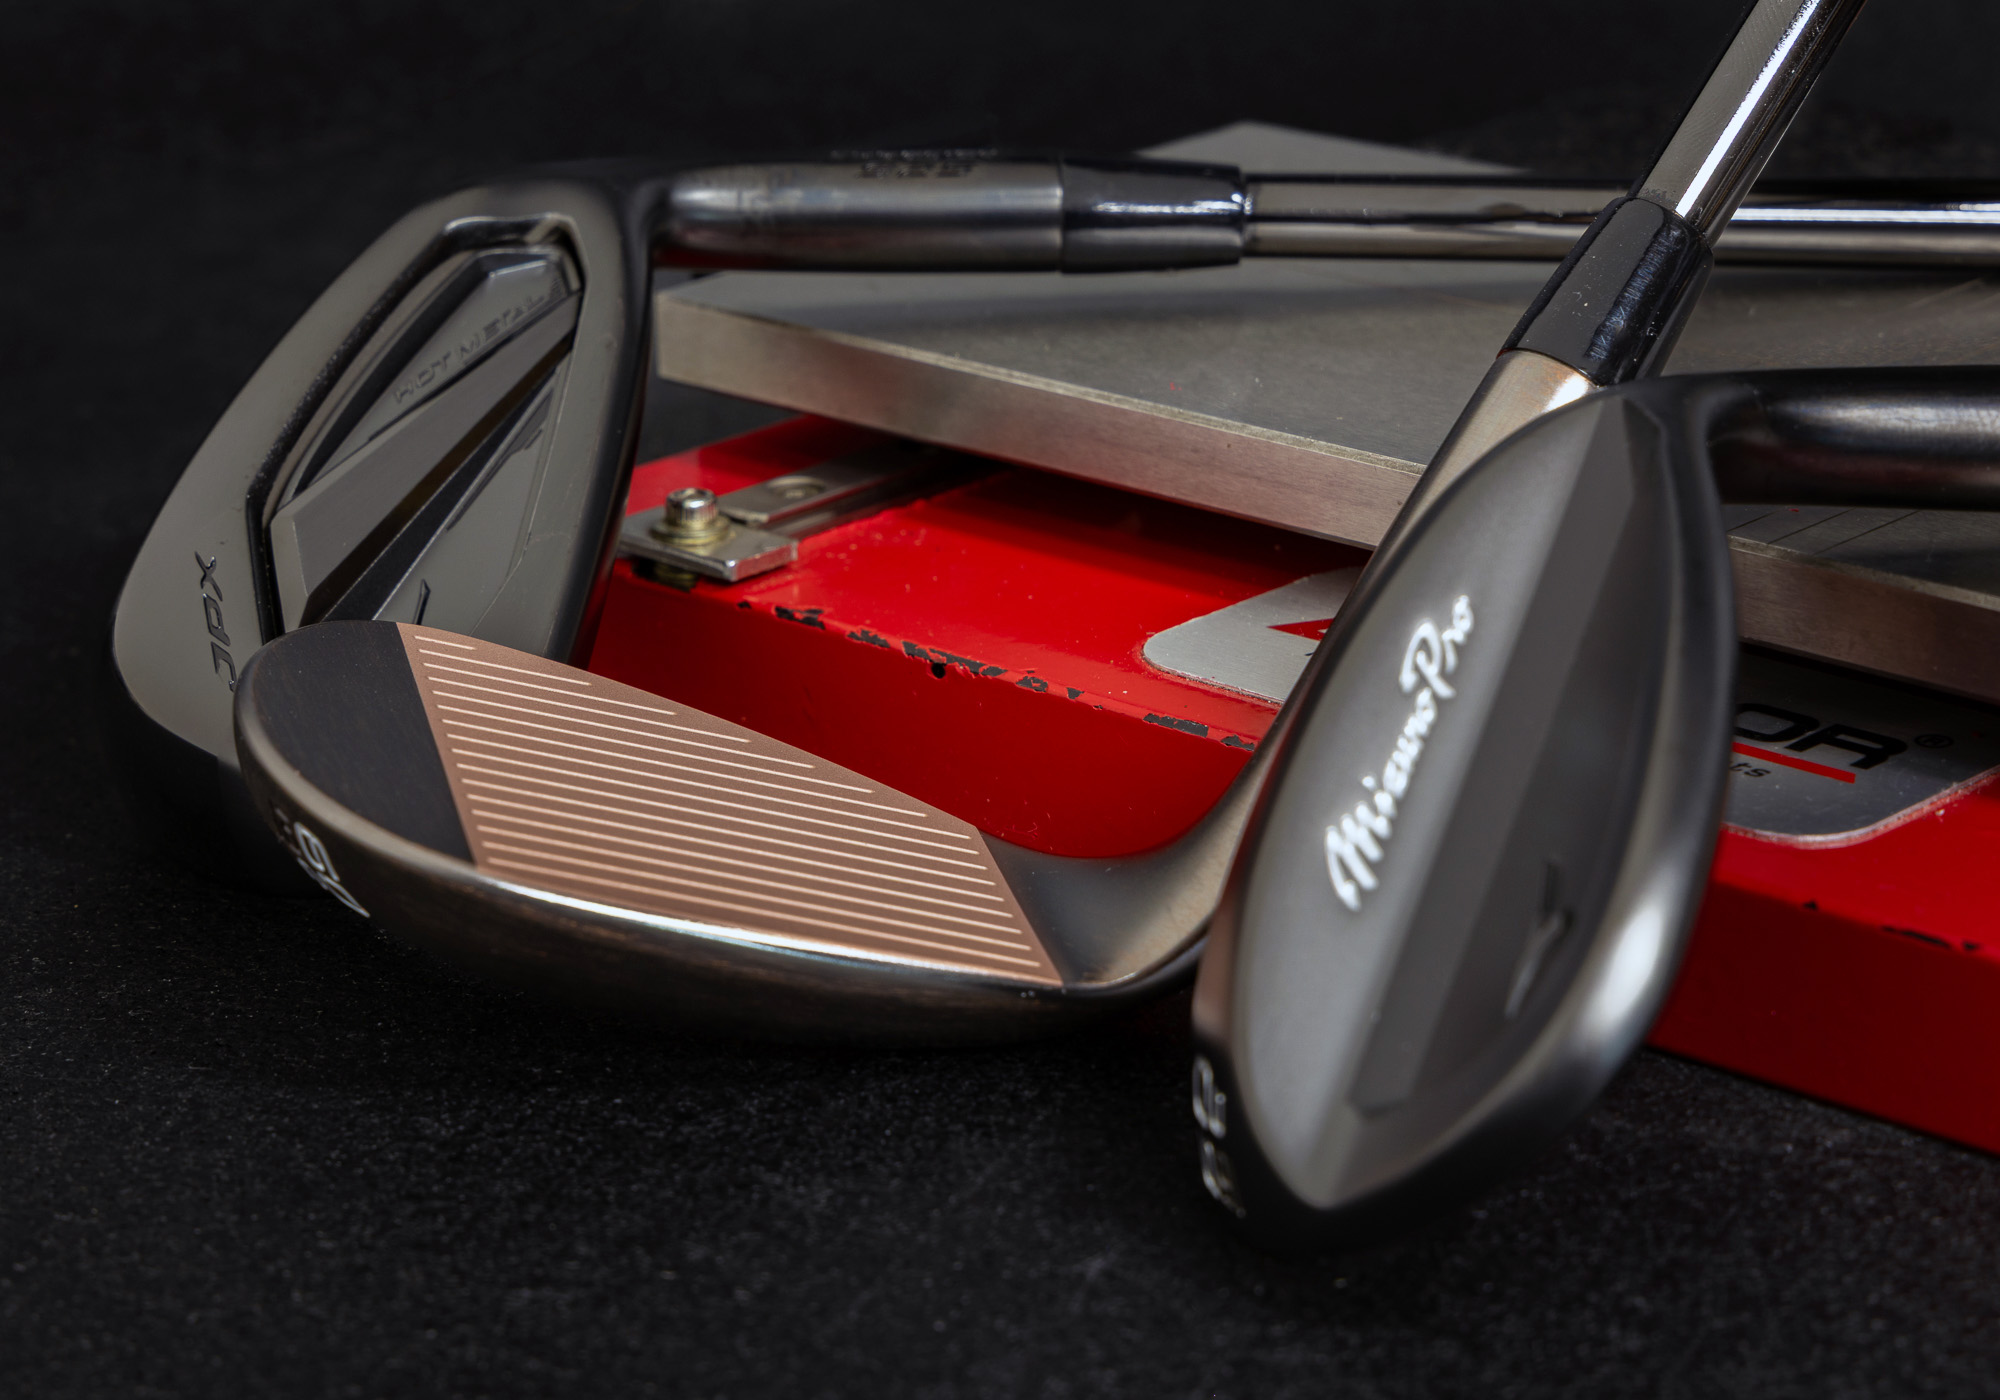
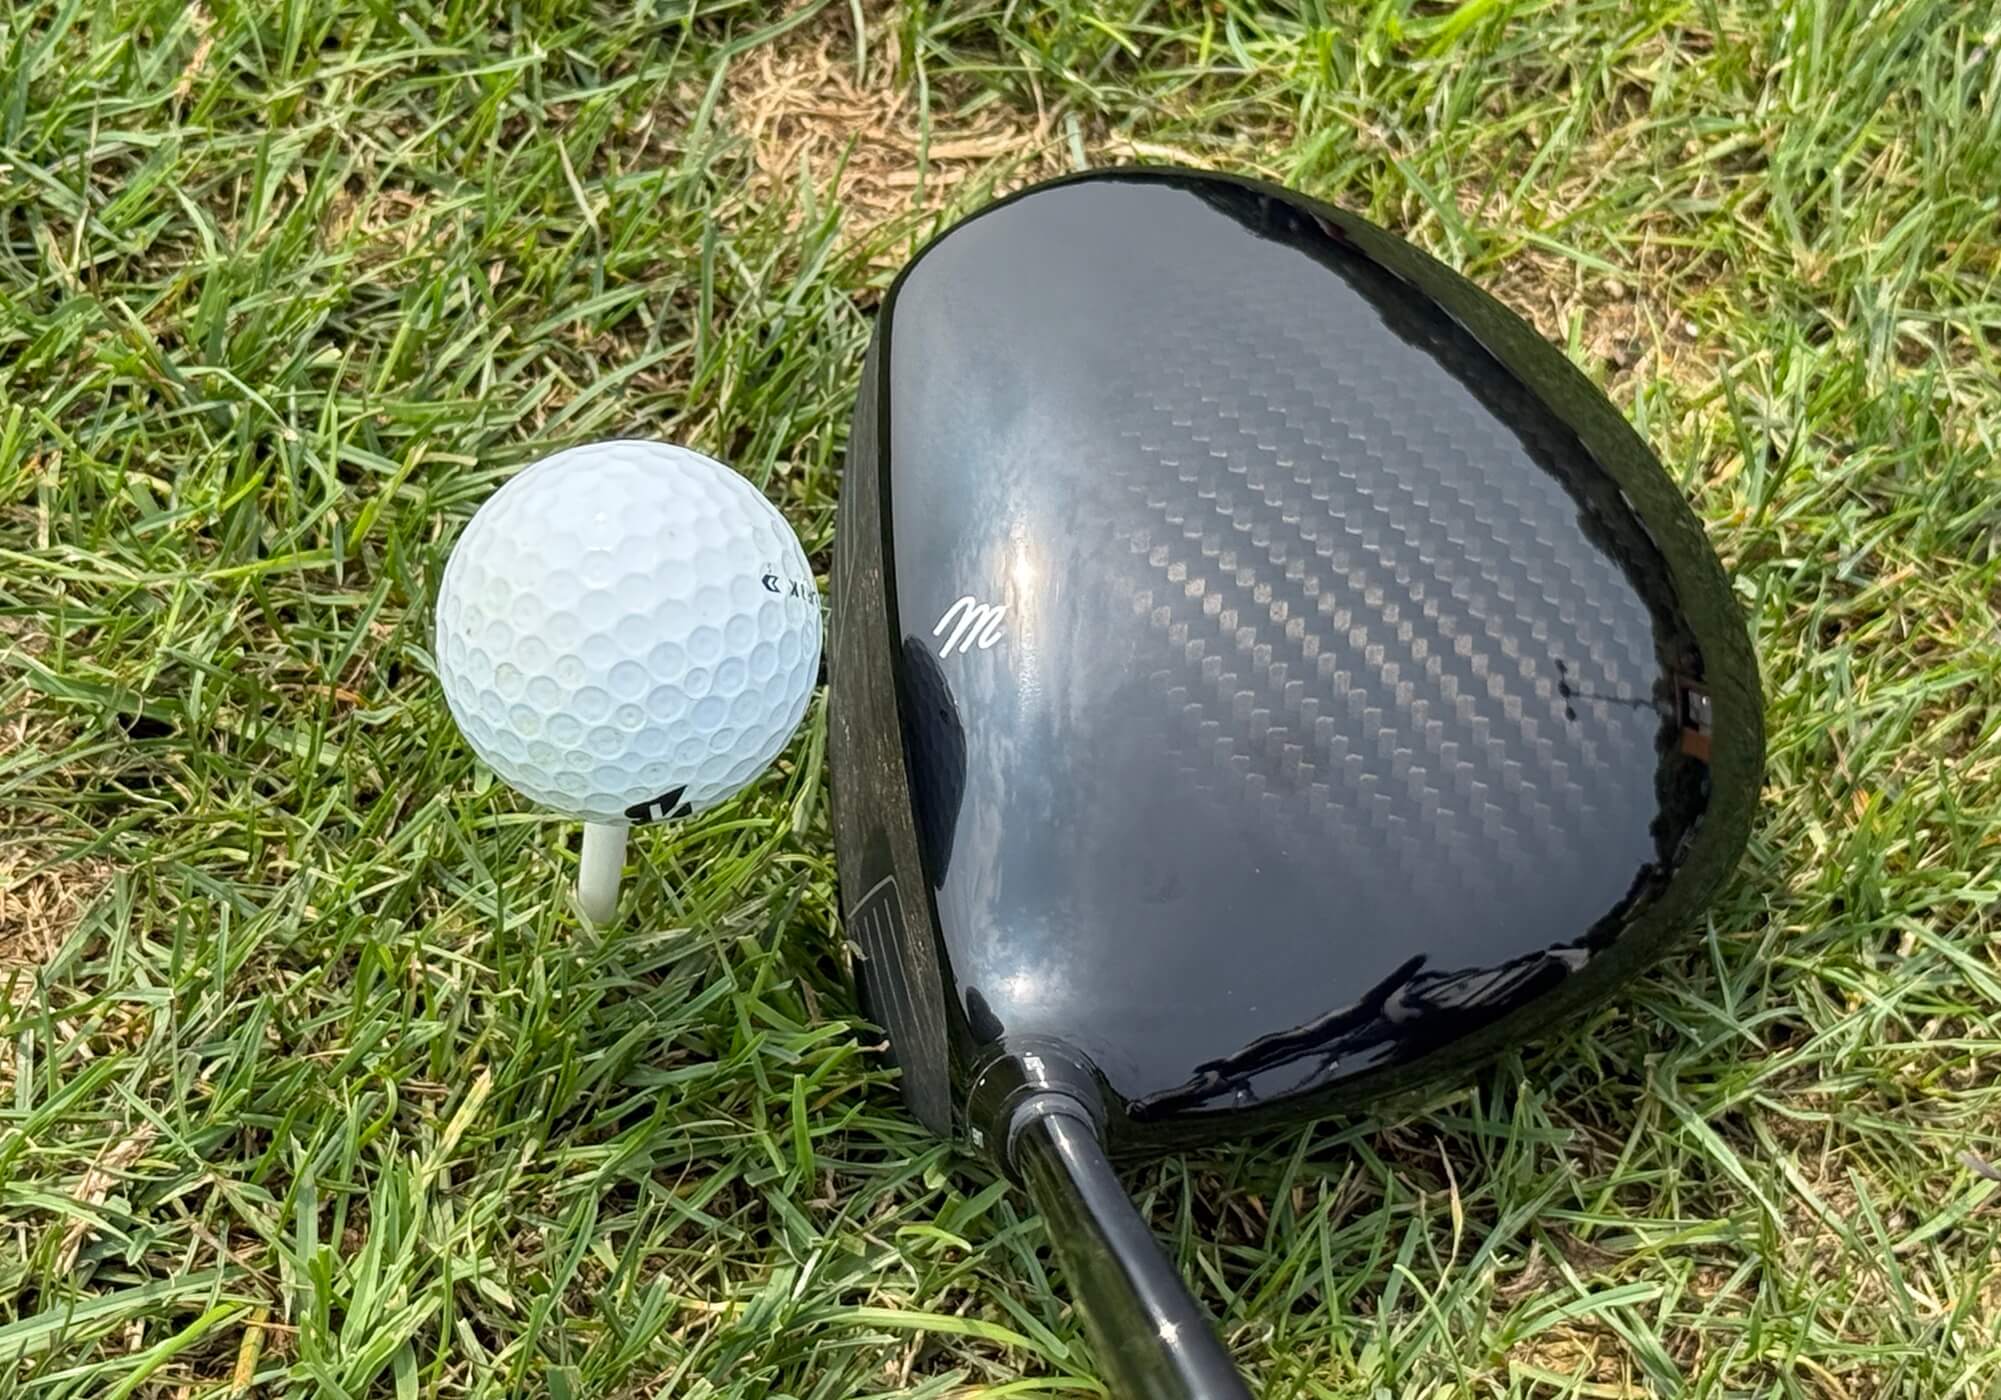
Line extensions by way of new colorways have moved from industry trend to golfer expectation, so you had to know this was coming. For the tail end of the season, Mizuno has delivered with new finish options across three of its products: the JPX 925 Hot Metal irons, Mizuno Pro T-1, and Mizuno Pro T-3 wedges.
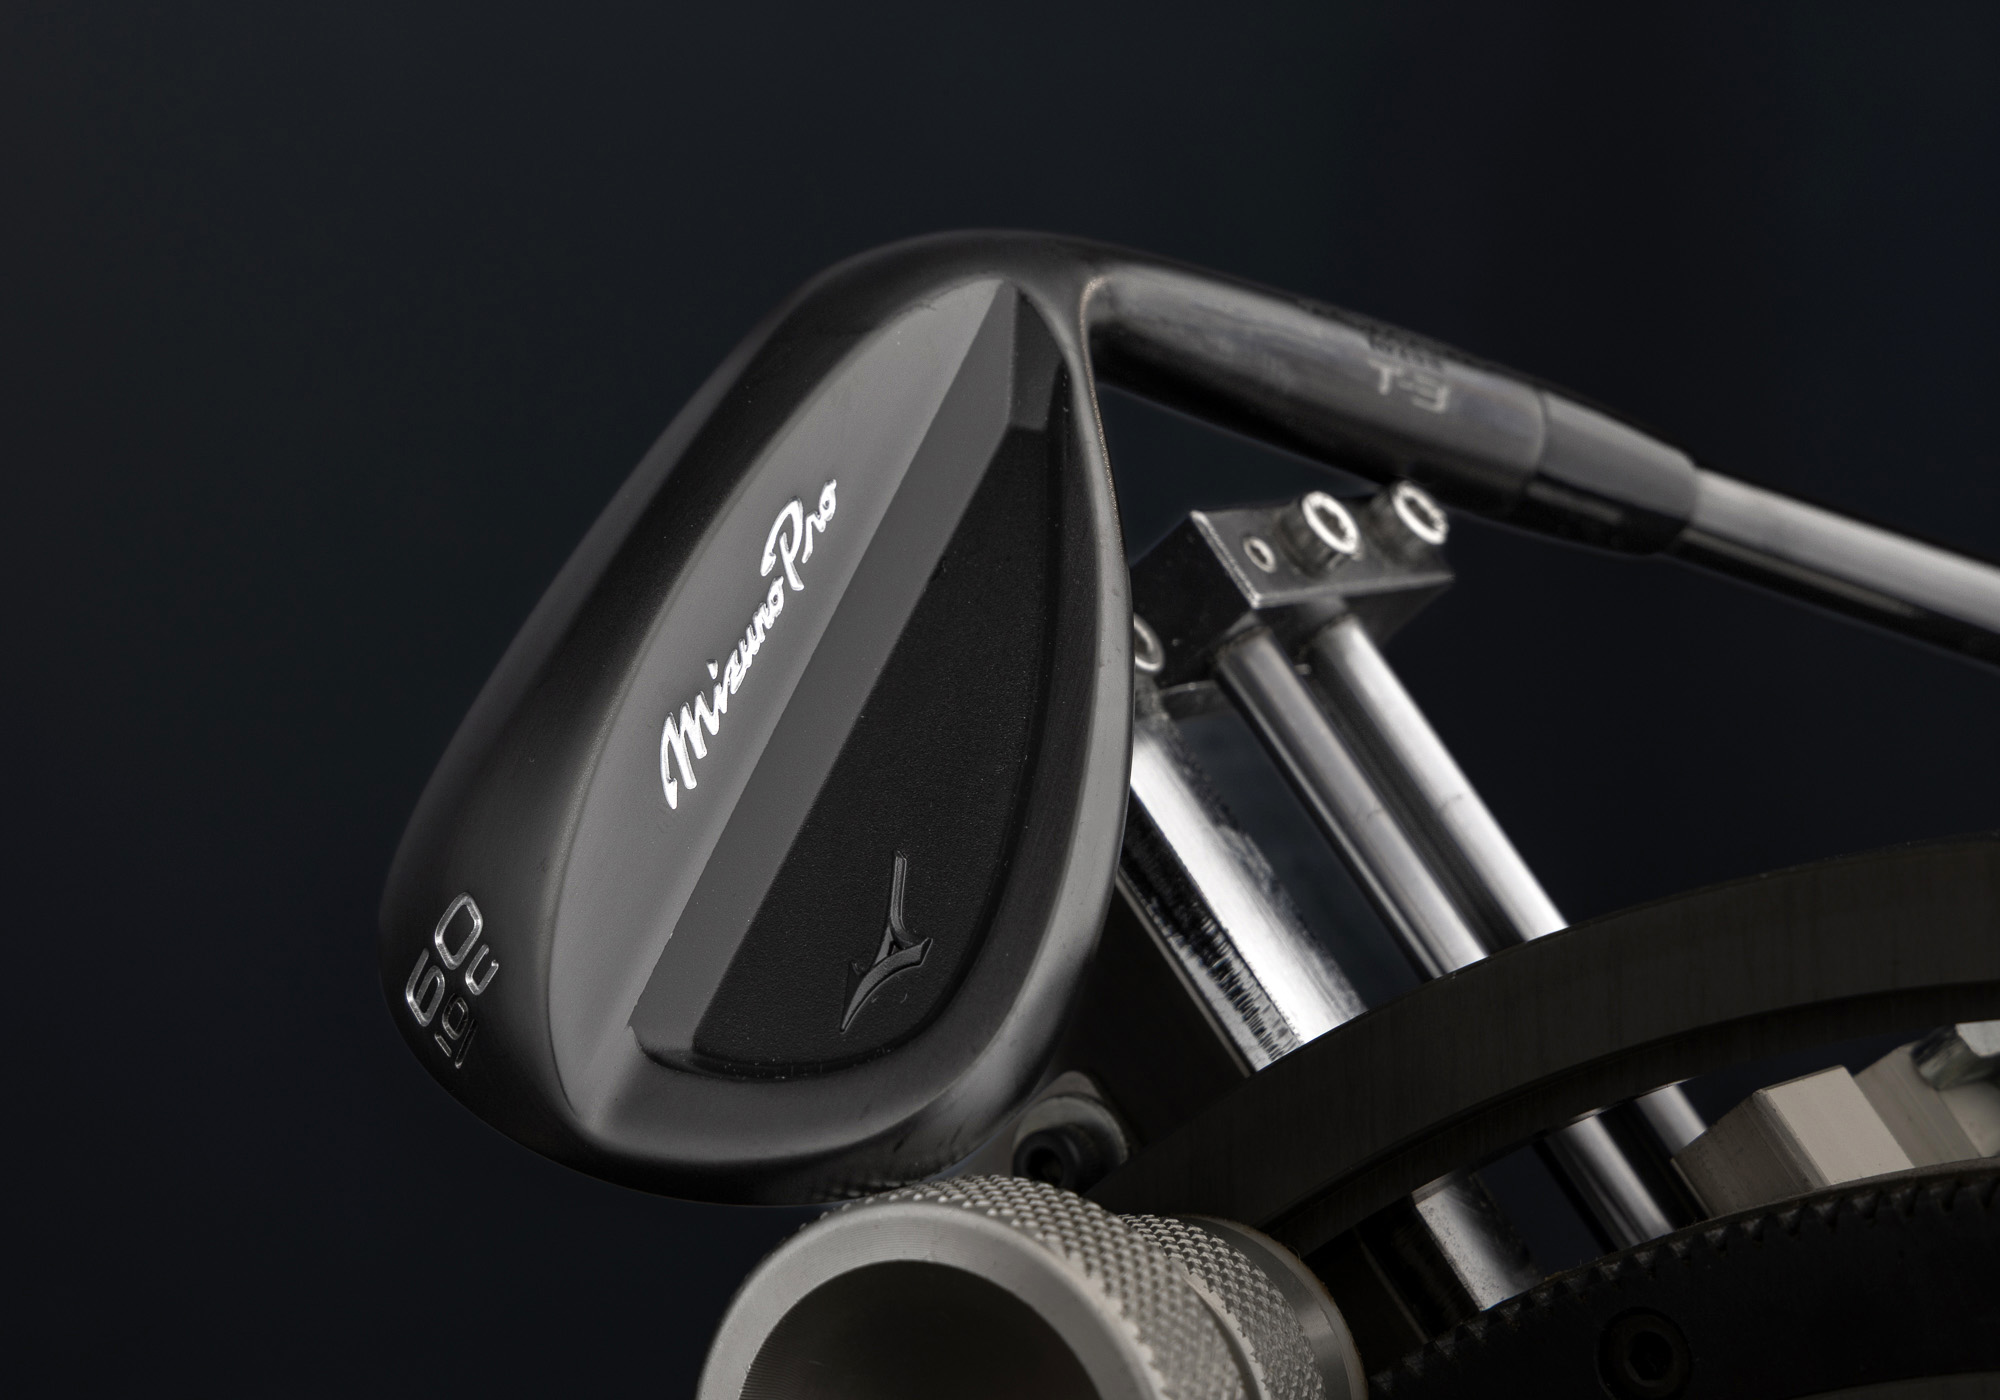
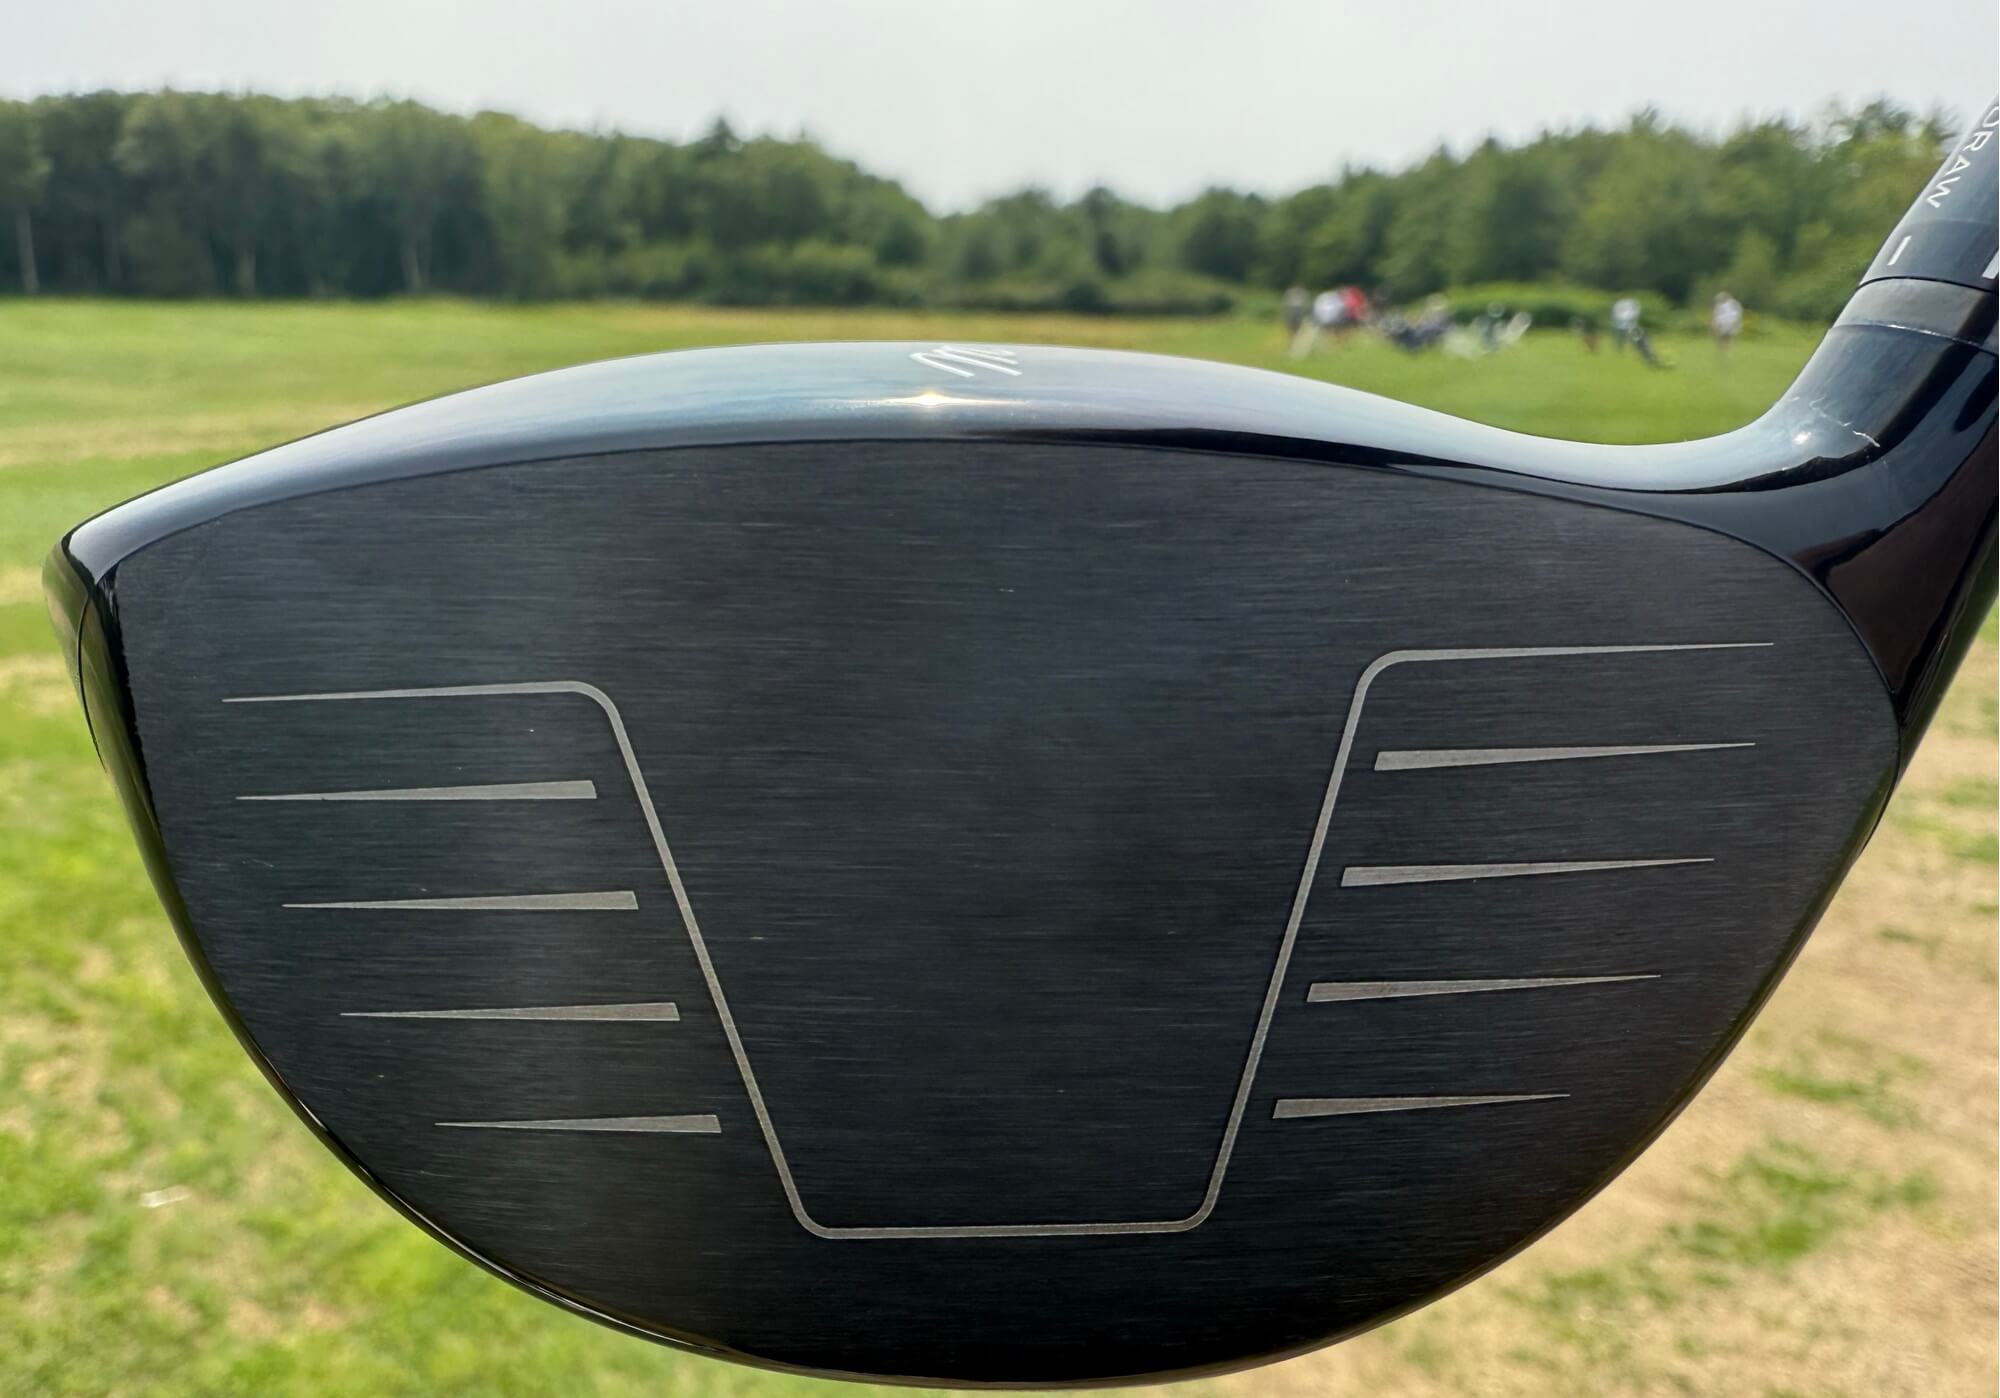
Mizuno’s JPX 925 Hot Metal irons are now available in a Black Ion finish. Mizuno’s standard take on black is that the treatment reduces glare while maintaining the same Nickel Chromoly chassis and tungsten weighting that defines Hot Metal’s high launch and high-speed performance.
Said another way, it’s the same iron, just moodier.
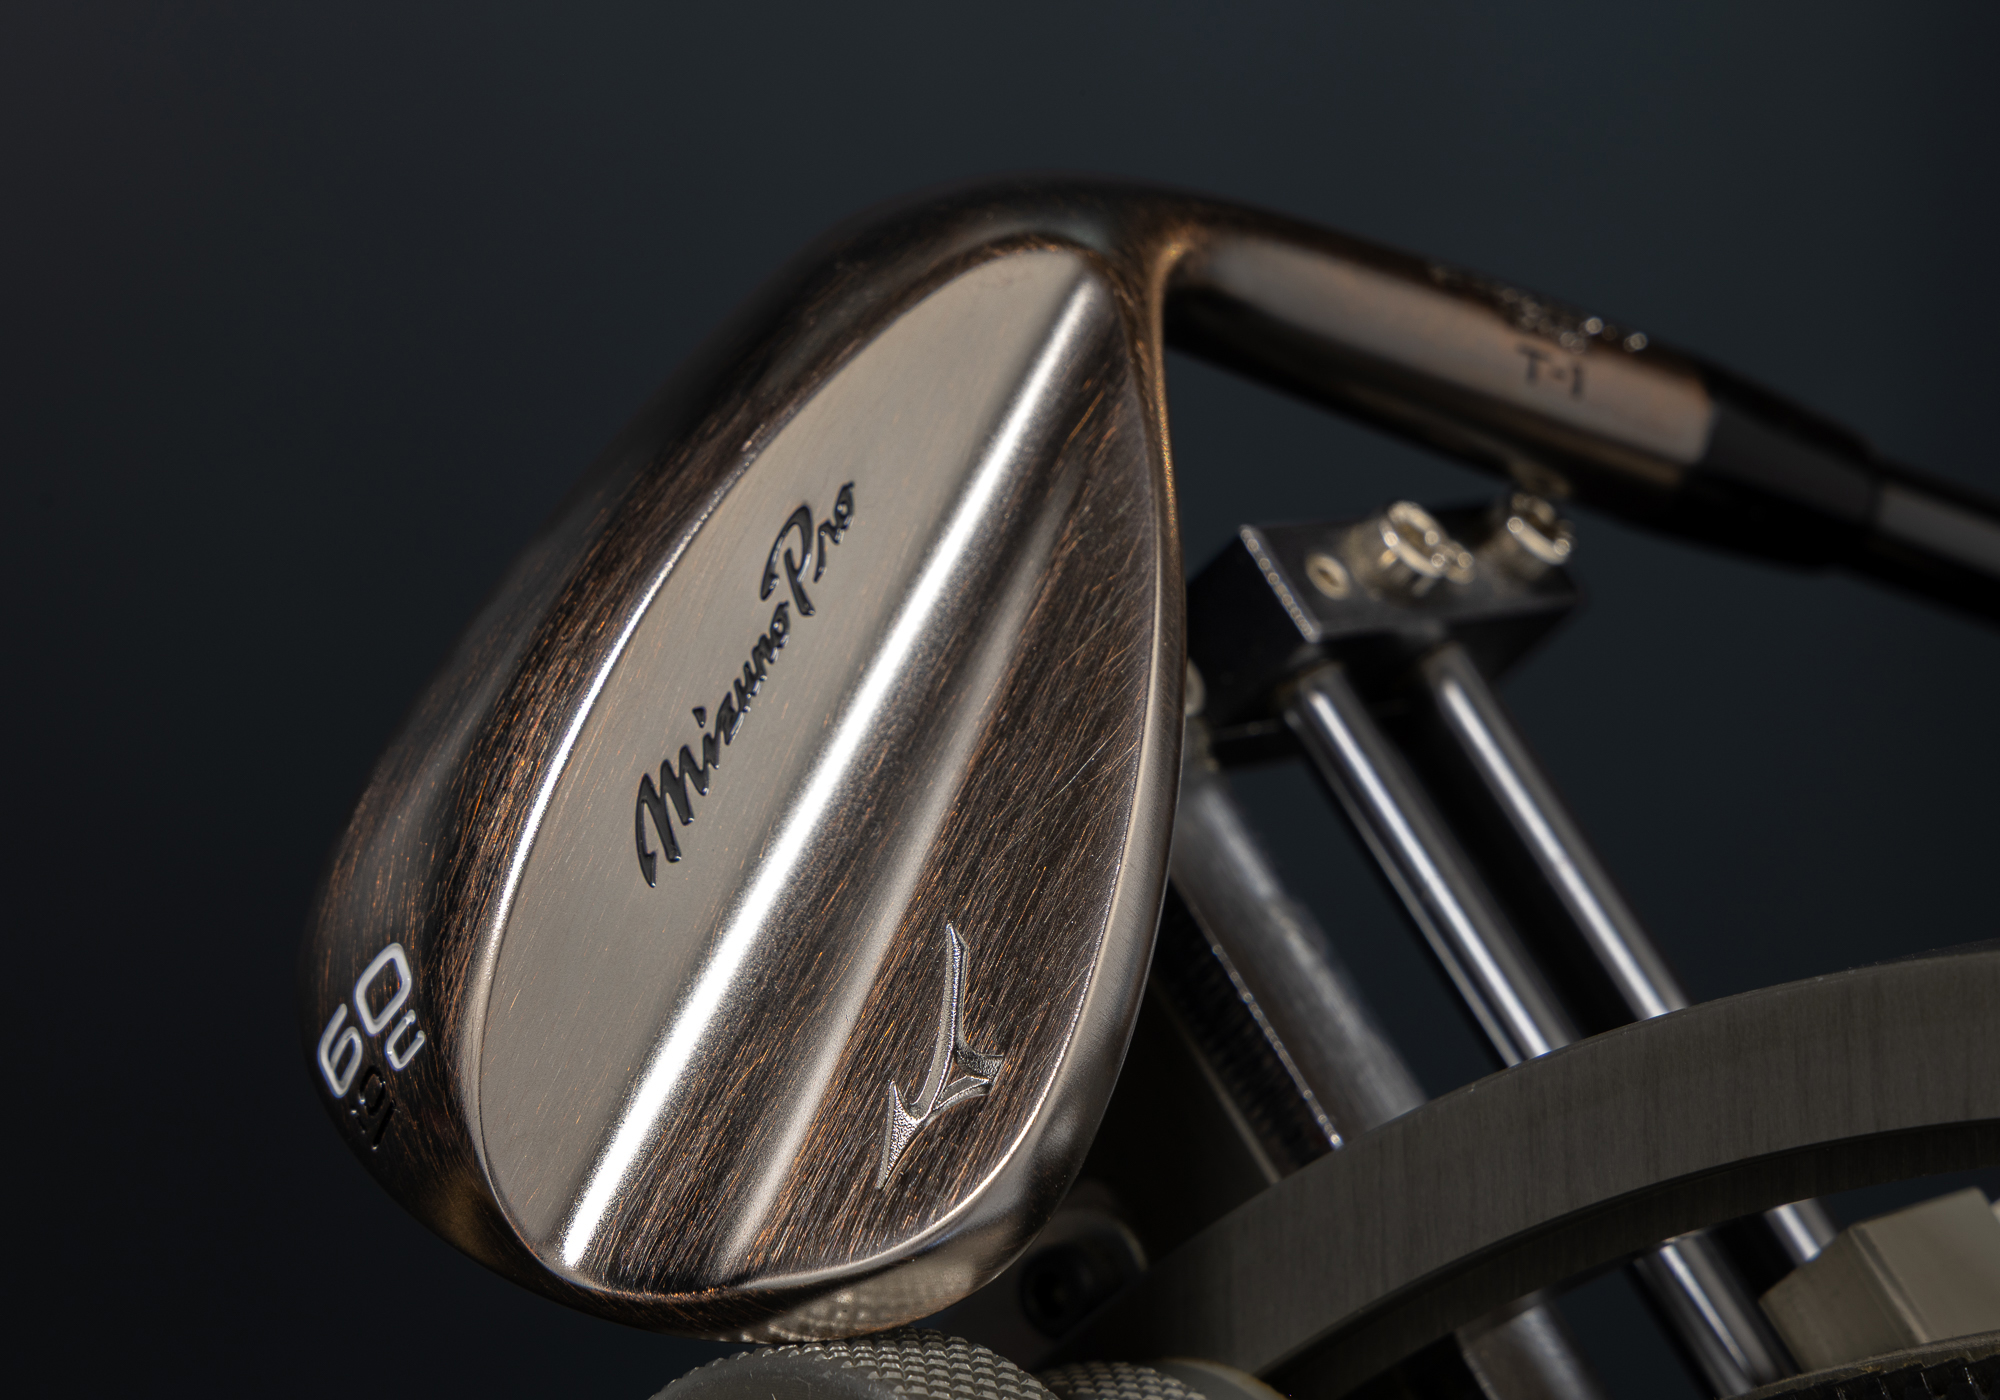
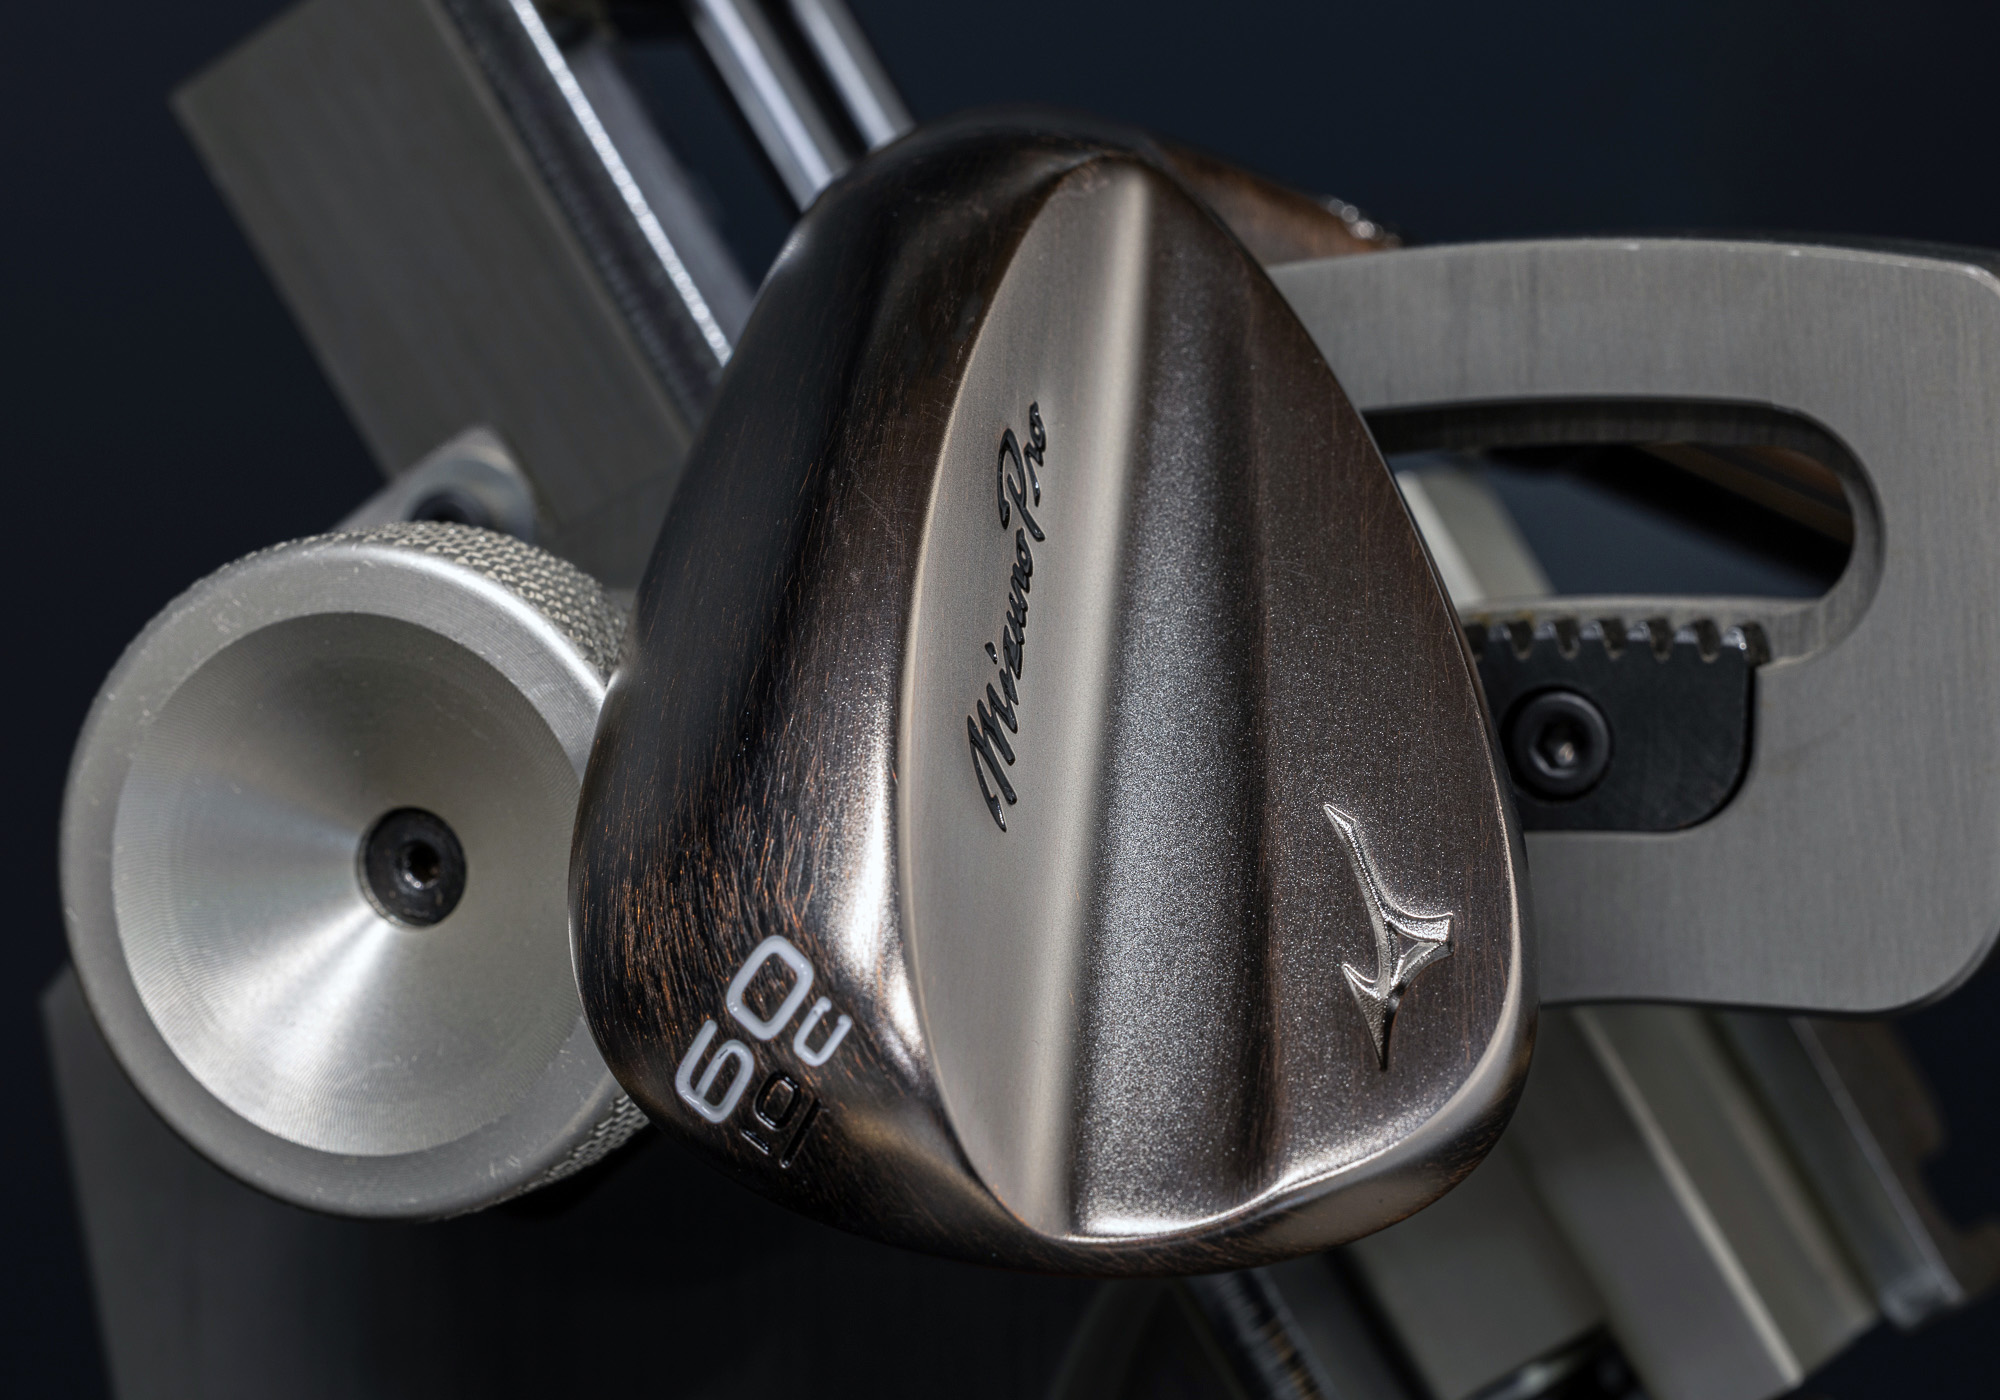
For my money, the previous execution of Mizuno’s Denim Copper finish is one of the best executions of copper finishes in the game. Hell, it might have been my favorite. This time around, the copper color is more muted and relies on the light to really pop. If you’re like many golfers and absolutely love copper treatments, but want something a bit more subtle, the new Demin Copper might be perfect for you.
The Denim Copper T-1 maintains its Grain Flow Forged HD construction from 1025E Pure Select Mild Carbon Steel with copper underlay, delivering that buttery-soft feel that’s unmistakably Mizuno.
Golf equipment, my friends, is not a zero-sum game.
Every year, when the mainstream OEMs release their new drivers, the online community is inundated with moaning, wailing and gnashing of teeth.
“Golf is getting too expensive,” we cry. “These greedy OEMs are driving the average golfer out of the game. When will it end?”
Spoiler alert, my fellow GolfSpies: It won’t.
Every year, the best-selling drivers are also the most expensive ones. Hey, I don’t make the rules. I just report the facts.
Great gear doesn’t need to be brand-new. Many of the best-performing golf clubs from 2024 are now available at lower prices, making this a smart time to upgrade without overspending.
We pulled data from MyGolfSpy’s Most Wanted testing to highlight which category winners have dropped in price, which ones are still holding strong and where you can get the most value for your money.
Some of the top-ranked models from 2024 are finally getting price cuts. If you’re shopping for a driver that earned high marks in MyGolfSpy’s testing for accuracy, forgiveness or raw distance, these are the ones to watch. Below are the 2024 winners with the biggest price drops.
| Club | MSRP | Current Price | 2024 Test Winner For… |
|---|---|---|---|
| Callaway Paradym Ai Smoke Max D | $599 | $399 | Longest Driver of 2024 |
| PXG 0311 XF Gen6 | $599 | $299 | Most Forgiving Driver |
| PING G430 Max 10K | $599 | $449 | Most Accurate Driver of 2024 and Best Overall |
Fairway woods aren’t as expensive as drivers but the problem is that your golf bag probably needs more than one. Now is a good time to grab some of the 2024 standouts like the Paradym Ai Smoke Triple Diamond or TaylorMade Qi10 Max. The Wilson Dynapower fairway wood didn’t win a category but it was the runner-up and just dropped from $249 to $199.
| Club | MSRP | Current Price | 2024 Test Winner For… |
|---|---|---|---|
| Callaway Paradym Ai Smoke Triple Diamond | $349 | $249 | Best Overall & Longest |
| TaylorMade Qi10 Max | $349 | $269 | Most Accurate Fairway Wood |
| Haywood Golf Fairway Wood | $239 | $209 | Most Forgiving Fairway Wood |
In 2024 hybrid testing, the PING G430 stood out as both the best overall and most accurate, while the Callaway Paradym Ai Smoke Hybrid took top honors for distance. While not an official winner, the TaylorMade Qi10 Hybrid was a strong runner-up and has dropped from $299 to $229.


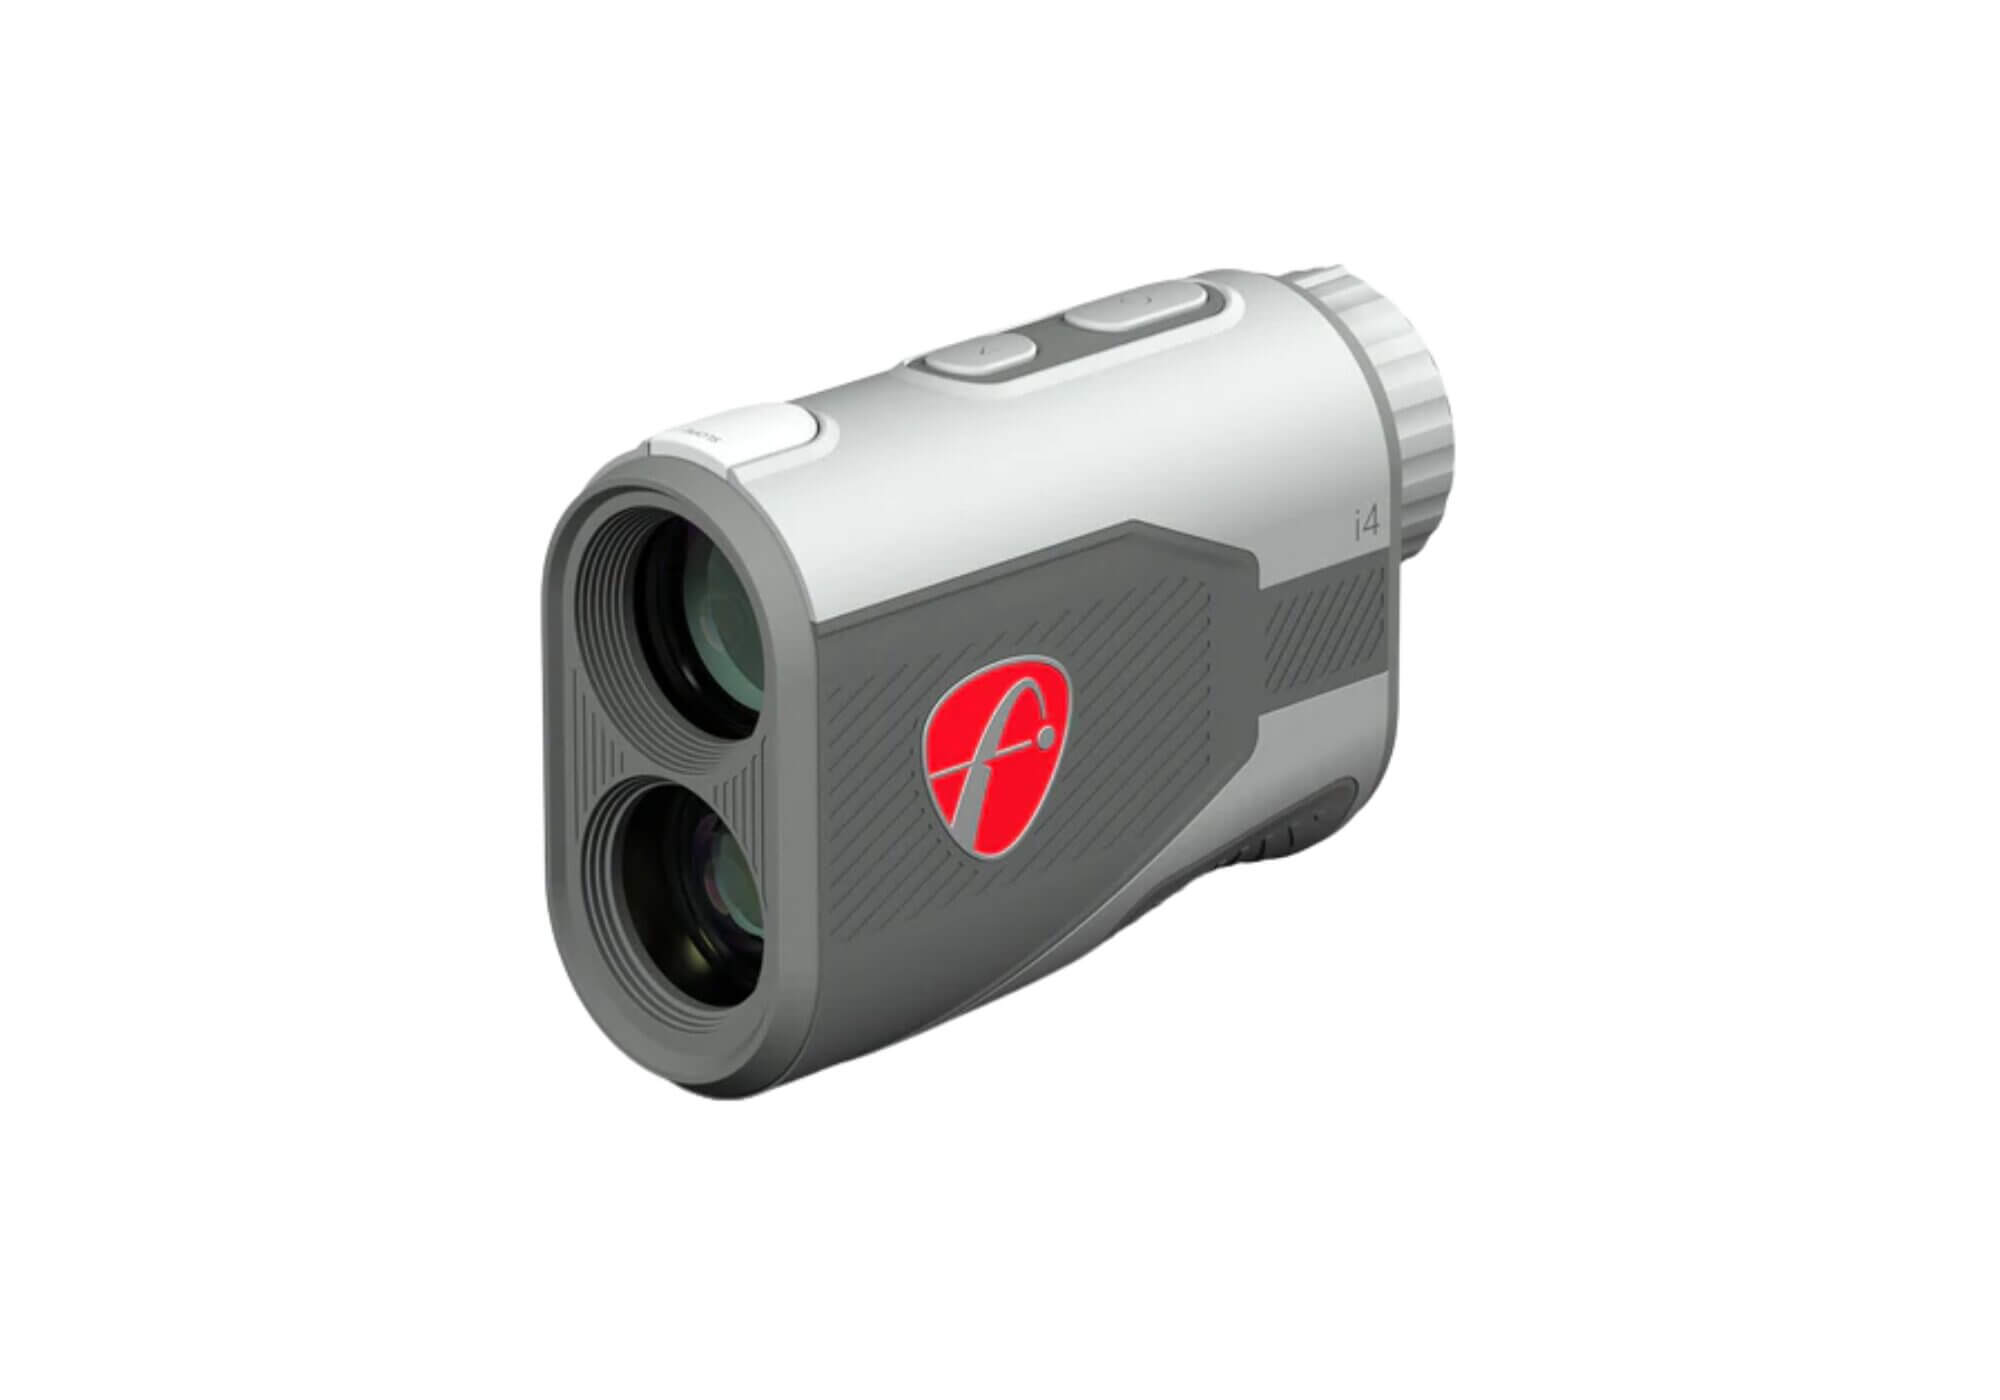
If you’re in the market for a new golf rangefinder, it’s easy to get stuck choosing between the big names like Bushnell, Garmin and Nikon. But the truth is that some of the best-performing rangefinders of 2025 came from brands you probably haven’t considered.
After testing 35 rangefinders for accuracy, speed, optics, display quality and features, these three under-the-radar brands stood out.
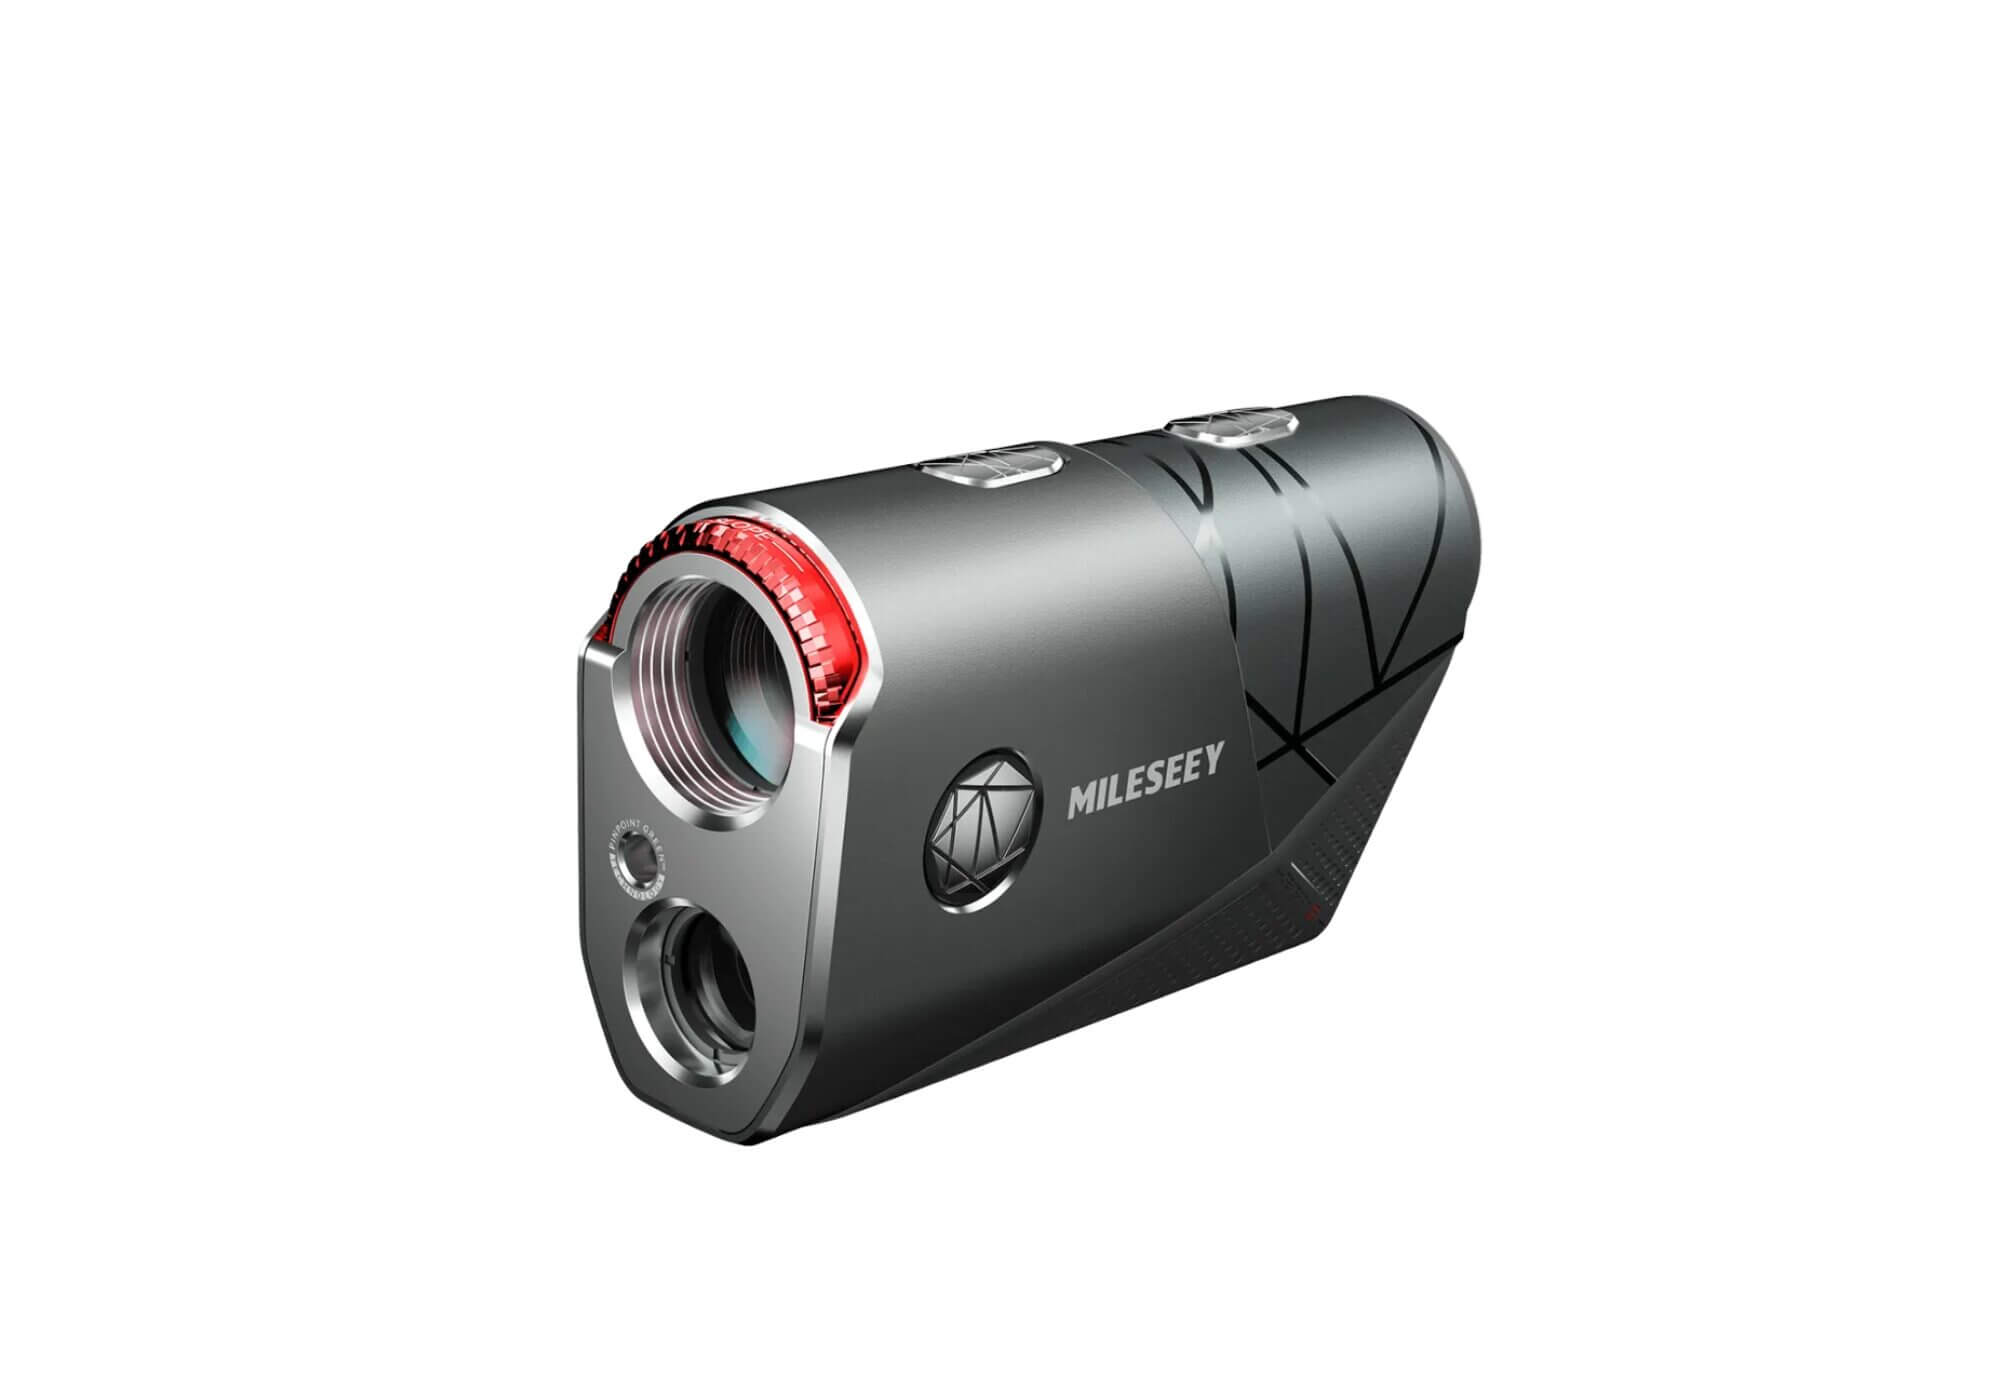
The Mileseey GenePro S1 scored a 9.6/10 in our rangefinder testing. It also took the honor of Staff Pick. It’s packed with high-end features, the most impressive of which is likely the “Ball to Pin” technology.
“Ball-to-Pin Tech” lets you measure the distance between any two points on the course, great for cart path-only rounds.7.5x magnification and a clean, uncluttered display help you lock onto targets fast.The state-of-the-art optics offer a wide, haze-free field of view that testers raved about.Despite being heavier than most rangefinders, the S1 delivers reliable, repeatable yardages. It also has vibration feedback for extra confidence. It’s also the first-ever AI-powered golf rangefinder, able to provide putt length and slope-adjusted yardages with precision.
Best For: Golfers who want premium optics, innovative tech and pinpoint accuracy, even from tough spots on the course.

Golf alignment is not a fun thing to practice. Call it boring. However, if you don’t spend some time working on alignment, it’s going to hurt you on the course. We’ve all hit a shot that felt perfect only to see the ball sailing nowhere near the target. More often than not, the issue isn’t your swing. It’s your alignment. Here are four of the most common alignment mistakes that set you up to fail, plus one bonus tip that far too many golfers skip.
One of the easiest ways to misalign your body is by walking into the ball from the side. When you approach from an angle, your body tends to close off to the target line before you even take your stance.
Instead, walk in from directly behind the ball.
Keep your body open until the very last moment, then square up as you finalize your setup. This lets you stay aware of the target and ensure that your alignment has not changed. Coming in from behind the ball lets you build a neutral stance right from the start.
Trying to aim at a 150- or 175-yard flag without a close visual cue is very difficult. In fact, it’s so difficult that it becomes ineffective.
Golf isn’t cheap. Between gear, green fees and all the stuff that marketers swear will lower your handicap, it can get expensive fast. Some of the golf expenses are worth your money but others become money-wasters. We found the question, “What’s the biggest money waster in golf?” asked on Reddit, and here is what golfers had to say.
This one came up repeatedly. If you’re new or high-handicap golfer Redditors say buying a dozen premium balls like Pro V1s for $50-plus is just wasting your money. I think it comes down to what matters to you. When you see ball test results and golf balls travelling 10 or more yards less than others, it’s hard to say that money spent on golf balls doesn’t matter at all. Maybe there’s a balance to be found here.
Buying the latest driver or iron set at full retail was another top pick for wasteful spending. Redditors pointed out that club technology doesn’t change much year to year, and used gear offers 90–95 percent of the performance at half the price. Some pointed out that no club will fix your swing; lessons will. Of course, there were others that decided lessons were a complete waste of money, so you’ll have to figure that one out.
The $120 hoodies and $80 polos may look good, but Reddit golfers questioned whether they do anything for your game. Many suggested shopping at Walmart, Kohl’s or eBay and saving the expensive gear for special occasions. A few users admitted they splurged on one item, usually a hoodie or jacket, but said it had to earn its keep on and off the course.
If you want to cut golf costs fast, stop riding. Dozens of Redditors shared that walking saved them hundreds (or even thousands) per year. Plus, many said walking helps them focus more and keeps their game sharper.


Megha Ganne defeated Brooke Biermann 4-and-3 on Sunday to win the U.S. Women's Amateur.
Justin Rose used a unique setup of Callaway, TaylorMade, Titleist and Miura clubs to pick up his first PGA Tour win in two years.
The post Justin Rose’s clubs: Inside his FedEx St. Jude Championship-winning setup appeared first on Golf.
Meghan Ganne has been chasing a USGA title for the better part of a decade. On Sunday, she relied on her superpower to achieve her dream.
The post Megha Ganne’s superpower made her U.S. Women’s Amateur dreams reality appeared first on Golf.
In this week’s roundtable, our experts debate Ryder Cup bubble players, Tommy Fleetwood's issue, T.V. ratings and more.
The post Tour Confidential: Which Ryder Cup bubble players need big week at BMW? appeared first on Golf.
Justin Rose defeated J.J. Spaun to win the FedEx St. Jude Championship. It was a win that made us hear something he has long believed.
The post Justin Rose’s FedEx St. Jude win delivered message he has long believed appeared first on Golf.
If you’re a Tommy Fleetwood fan (like me), it was another rough Sunday afternoon. Just as he did at the Travelers, Fleetwood carried the lead deep into the final round but could not close it out. This time, it was Justin Rose and J.J. Spaun who stole the show in Memphis.
Rose has made a habit of finding himself in playoff situations this season, and Spaun was more than ready for the challenge. After two pars on the first playoff hole and birdies on the second, they returned to 18 for a third go-around with a new pin location.
Both hit it close, but only Rose made the putt, sealing the win and taking home the $3.6 million first-place check.
| Pos | Player | Score | Money |
|---|---|---|---|
| 1 | Justin Rose | -16 | $3,600,000.00 |
| 2 | J.J. Spaun | -16 | $2,160,000.00 |
| T3 | Scottie Scheffler | -15 | $1,160,000.00 |
| T3 | Tommy Fleetwood | -15 | $1,160,000.00 |
| 5 | Cameron Young | -11 | $800,000.00 |
| T6 | Rickie Fowler | -10 | $670,000.00 |
| T6 | Akshay Bhatia | -10 | $670,000.00 |
| T6 | Andrew Novak | -10 | $670,000.00 |
| T9 | Ludvig Åberg | -9 | $500,000.00 |
| T9 | Kurt Kitayama | -9 | $500,000.00 |
| T9 | Patrick Cantlay | -9 | $500,000.00 |
| T9 | Chris Kirk | -9 | $500,000.00 |
| T9 | Ben Griffin | -9 | $500,000.00 |
| T14 | Jhonattan Vegas | -8 | $360,000.00 |
| T14 | Si Woo Kim | -8 | $360,000.00 |
| T14 | Bud Cauley | -8 | $360,000.00 |
| T17 | Hideki Matsuyama | -7 | $280,000.00 |
| T17 | Russell Henley | -7 | $280,000.00 |
| T17 | Sungjae Im | -7 | $280,000.00 |
| T17 | Jacob Bridgeman | -7 | $280,000.00 |
| T17 | Sepp Straka | -7 | $280,000.00 |
| T22 | Aaron Rai | -6 | $185,667.00 |
| T22 | Brian Harman | -6 | $185,667.00 |
| T22 | J.T. Poston | -6 | $185,667.00 |
| T22 | Xander Schauffele | -6 | $185,667.00 |
| T22 | Harry Hall | -6 | $185,667.00 |
| T22 | Collin Morikawa | -6 | $185,667.00 |
| T28 | Justin Thomas | -5 | $139,000.00 |
| T28 | Sam Burns | -5 | $139,000.00 |
| T28 | Maverick McNealy | -5 | $139,000.00 |
| T28 | Taylor Pendrith | -5 | $139,000.00 |
| T32 | Viktor Hovland | -4 | $110,667.00 |
| T32 | Davis Riley | -4 | $110,667.00 |
| T32 | Denny McCarthy | -4 | $110,667.00 |
| T32 | Max Greyserman | -4 | $110,667.00 |
| T32 | Kevin Yu | -4 | $110,667.00 |
| T32 | Matt Fitzpatrick | -4 | $110,667.00 |
| T38 | Nico Echavarria | -3 | $84,000.00 |
| T38 | Patrick Rodgers | -3 | $84,000.00 |
| T38 | Jordan Spieth | -3 | $84,000.00 |
| T38 | Matthias Schmid | -3 | $84,000.00 |
| T38 | Robert MacIntyre | -3 | $84,000.00 |
| T38 | Thomas Detry | -3 | $84,000.00 |
| T44 | Ryan Gerard | -2 | $64,000.00 |
| T44 | Keegan Bradley | -2 | $64,000.00 |
| T44 | Nick Taylor | -2 | $64,000.00 |
| T44 | Lucas Glover | -2 | $64,000.00 |
| T48 | Stephan Jaeger | -1 | $53,400.00 |
| T48 | Harris English | -1 | $53,400.00 |
| T50 | Ryan Fox | E | $48,700.00 |
| T50 | Corey Conners | E | $48,700.00 |
| T50 | Emiliano Grillo | E | $48,700.00 |
| T50 | Cam Davis | E | $48,700.00 |
| T54 | Chris Gotterup | +1 | $46,200.00 |
| T54 | Sam Stevens | +1 | $46,200.00 |
| T56 | Mackenzie Hughes | +2 | $45,200.00 |
| T56 | Jason Day | +2 | $45,200.00 |
| T56 | Wyndham Clark | +2 | $45,200.00 |
| T59 | Michael Kim | +3 | $44,000.00 |
| T59 | Aldrich Potgieter | +3 | $44,000.00 |
| T59 | Shane Lowry | +3 | $44,000.00 |
| T62 | Erik van Rooyen | +5 | $43,000.00 |
| T62 | Jake Knapp | +5 | $43,000.00 |
| T64 | Tom Hoge | +6 | $42,000.00 |
| T64 | Brian Campbell | +6 | $42,000.00 |
| T64 | Tony Finau | +6 | $42,000.00 |
| 67 | Joe Highsmith | +8 | $41,200.00 |
| T68 | Min Woo Lee | +10 | $40,600.00 |
| T68 | Daniel Berger | +10 | $40,600.00 |
The post FedEx St.Jude Prize Money Payout appeared first on MyGolfSpy.
A heartbroken Tommy Fleetwood's words after the FedEx St. Jude spoke to the player's exhaustive search for a first PGA Tour win.
The post Tommy Fleetwood’s latest heartbreak ended with a telling interview appeared first on Golf.
Justin Rose made up a three-shot deficit over the last five holes against hard-luck Tommy Fleetwood, and then made two birdies in a playoff against U.S. Open champion J.J. Spaun to win the FedEx St. Jude Championship on Sunday.
© 2025 GolfLynk.com a division of Outdoorsmen.com